Showing posts with label Bow. Show all posts

Tuesday, December 18, 2012

DIY Paper Gift Bow

Happy holidays everyone! 'Tis the season to be crafting! I tried making my own Paper Gift Bow this year because it's not only cheap but you can reuse paper that you were going to throw away anyways. Hope you get a chance to make some for this gift giving season!


Materials:
- Sheet of paper
- Scissors
- Tape
- Stapler


Steps:

1. Cut your paper strips out! You will need:

- 3 long strips/width of the sheet of paper (mine was 8.5 inches)
- 3 shorter strips (7.5 inches)
- 3 even shorter strips (6.5 inches)
- 1 very short strip (2.5 inches)

Depending on the size you want to make your bow, change up the measurements. Also the wider the strips the more difficult it might be to twist, so keep that in mind!


2. Take each strip and twist both sides so that the ends meet in the middle. Do each side one at a time and tape it so they won't move. Leave that little piece for later. Hopefully my pictures will help!

<<<<<<<<<                     >>>>>>>>>


3. After you make all your pieces, put together each layer (of 3 pieces of the same size) so that they kind of make a 6 petaled flower. Then staple all of them together. Largest one on the bottom, with the other two on top. Take the smallest strip and make a loop, holding together with tape. This will be in the middle of the bow, covering the staple. ;) Don't know if I'm making sense but I'm trying to... Pictures always help!


Here's my first Paper Gift Bow!


What I've learned:

-You can have pointy corners or rounded ones depending on how tightly you decide to twist your paper strips before taping them.
- I tried to twist them together more so that the corners would be pointy!
- Card stock might be a good alternative to paper if you want a "tougher" bow.


Why not recycle and save money at the same time! Added bonus: impress your relatives with you're crazy craftin' skills!


I liked this project so much! I want to try making similar stuff especially around the holiday season! Stay tuned for more! 

Alison :)


Tuesday, August 7, 2012

DIY Denim Clutch

Hi guys! I still had a ton of left over material from some of my previous DIY's so I decided to make myself a Denim Clutch! I know there are a lot of templates online, but most of the ones I found only had one pocket, where I like the functionality of a two pocket clutch. I didn't find a template so I just came up for one myself! I used a Denim Bow from a previous post to make it a little more "pretty" and I think it came out pretty nicely. I hope you like this post and that you feel inspired to try it for yourself!

Materials:
- Denim, or any kind of fabric really... (mine are from a pair of old jeans)
- Pins
- Ruler or measuring tape
- Velcro square
- Shears
- Needle and thread (I chose a blue that kind of matched my fabric)


Steps:

1. Cut out your fabric/template. I realize mine looks pretty uneven, but I was using the the leftover material from my other projects so I had to improvise. Ideally you'd have square corners and straight lines! The length of mine at the longest point was about (since it's not really straight) 15 inches, the middle length was about 8 1/2 inches, with the width (or height?) was around 15 inches (from top to bottom) and at the shorter part 5 inches wide.


2. Now I highly recommend taking the time to plan for your next couple of steps by pinning your hems down. Use a measuring tool to make sure the top and bottom of your clutch are the same width while you pin. Fold those flaps in to make what will be your first pocket! In this step, you can kind of start to see the size of your clutch (especially in terms of width).


3. Once your got your hems in place, sew the flaps together. Make sure not to sew this part all the way through. Now, sew across the purse going all the way through to the other side to make your pocket. This should be going through the middle of your clutch with the pocket opening downward. Be careful sewing this part because you will be able to see the thread on the outside of the purse.

*I don't have a sewing machine, so I sewed everything by hand (obviously you can use your machine if you have one). I'm saving up for one!*


 4. Next, I hemmed the sides above the pocket you just made. As your hemming, take your pins out. Again, keep in mind that your thread will be seen on the outside of your clutch. Once you've finished hemming that part, fold your first pocket up to create two pockets! Before this step, your pocket should have opened facing downward. Now those two sewn-together-flaps will be the divider between your two pockets.

In the third picture below, you can see how I sewed my two pockets. I used an "invisible" hem technique, sewing in between the pockets on the outside. You can choose to sew this the same way you did the other hems if you find it easier or if you want your thread to show. This entire step is long one so when you get through it, give yourself a little pat on the back!


 5. I used Velcro as a "clasp" for where the top of my clutch will open and close to. You can use other buttons, zippers or magnets to do something similar if your prefer (Velcro isn't exactly glamorous!). I made sure to sew both pieces in the middle, one on the top flap, one on the outside pocket. Just make sure you line it up right beforehand!


6. Here's where I attached my DIY Denim Bow! I just simply sewed it in place, making stitches until I felt like the bow was really secure. Not only is it cute, but it also covered my threads from the Velcro patch! ^.^ At this point you can go back and trim some of those loose threads if you haven't done so already!


Congratulations! You just made your very own DIY Denim Clutch!


What I've learned:

- When hemming, you can make smaller stitches for those on the outside of your clutch and larger ones facing the inside of your clutch so the thread isn't as noticeable. 
- Measuring and pinning everything in place is really important. Stop every once in awhile and make everything is in line to see if you need to make any adjustments.
- Try not to stab yourself when pinning your hem line... 
- A two pocket clutch is way better than a one pocket clutch!


Here's what I'm going to wear with my new clutch, when I go out for an iced coffee (love iced coffee)! I like that this clutch is super casual and its great to just carry your essentials in when you're on the go! I love that I can take this bag anywhere, even if it gets dirty because:

     1. Isn't a big deal because you didn't spend a ton of money on it,
     2. It's totally machine washable! 

What you thought of this DIY post! I hope you try it, and let me know how your clutch turned out!

Also... I am considering attaching some kind of strap, maybe make it into a wristlet, or a cross body bag. What do you think?


Alison :)

Wednesday, July 25, 2012

DIY Denim Bow

Hellooo! In my last post, I updated a pair of old jeans for summer (check it out: Old Jeans to New Shorts). In this post I'm going to be using the extra fabric from those jeans to make... drum roll please.... Denim Bows! I won't lie to you, I thought this was going to be really difficult and I was pretty nervous getting started. But everyone started somewhere right? Even with my basic sewing skills I managed to make not one, but two pretty decent looking bows! If you want to try it, keep reading! (I made sure to add a lot of pictures, hopefully it helps!)

Materials:
- Denim fabric (or other fabrics if you want to make a different kind of bow)
- Shears for cutting fabric
- Needle and thread
- Bobby pin (if you want to wear your bow in your hair) 


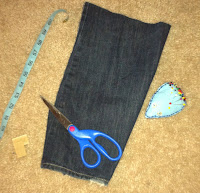
 For those of you who kept your material from my last DIY, just cut that pant leg so you can open it up. Then cut a small, rectangular section off that you will be using for your bow. Keep in mind that the length of your finished bow will be half of the length of your material and the width of your finished bow will be the a little bit smaller than the width of fabric you originally cut. Okay! Let's make this bow!


1. With your rectangular piece of fabric, hem the edges along the length of the material. It doesn't have to be perfect but it does have to be able to hold the edges down. Check out my pics:


<------ This is what it should kind of look like when you're done! You can also trim the excess thread as we go along.


2. After your done hemming, you want to sew the two "width" sides together to make sort of a mini cuff. Don't sew it through to the other side!


3. Now get prepared to cinch the middle part of your bow, this is when you'll start to see the bow shape through the folds/creases. Fold your bow to your desired shape and crease lines. In mine, I just made one crease in the middle. To do this, you have to make 3 zig-zag folds on the width of the bow. Once you get that, through the very middle, pull your needle and thread through to hold it in place. Then wrap the thread around the middle of your bow a few times, pull your needle and thread through a spot on the back side of your bow and tie a knot. Good job! 


                    front
back


4. You will need to cut another piece small of fabric to wrap around the middle of your bow and hide the thread. This piece should be long enough so that it over laps a little in the back. 


5. On the back of your bow, sew this middle piece in place. And.... you're done!


I decided that I wanted to be able to wear this in my hair, so I looped a bobby pin through the back of the middle piece. You can use different kinds of pins and secure them permanently with super glue or a hot glue gun if you'd like. I only had a booby pin but it still worked out okay!


***Sorry, I was having a little too much fun with the camera!***


What I've learned:

- Double knot the ends of your threads. The material I used had a little bit of "stretch" to it and one of my knots slipped through at the beginning.
- It's okay it your denim has frayed edges, it gives the bow an edgy look.
- If you're first bow doesn't come out the way you wanted, try again! I like my second attempt a lot more!


My second attempt:

I decided to make another, bigger bow! With this one, I was able to make two creases in the middle (mainly because it was bigger and easier to work with). I also flipped the middle piece around to show the what would be the inside of your jeans and I think it gives it a cool look! What do you think?


Please post comments and/or subscribe! I would love to hear from you!


Alison <3