Saturday, January 19, 2013

Adjustable Necklace Knot Tying

Hey everyone! For those of you who enjoy making your own jewelry specifically necklaces and bracelets, this might be able to help you! This is super easy to do so I hope you try it out!

Materials:
- Bead/beads
- String


I love that this can make the simplest jewelry a little more versatile!


Steps:

1. Tie a simple "Overhand Knot" with one end of your string to the other end.


2. With your loose end, do the same thing on the other end of the string (that you just tied). You should be able to move the knots along the string! This allows you to adjust the length of your jewelry!


Great! Here's what your necklace/jewelry should look like:


What I've learned:

- Make sure you use the right kind of rope or string. You don't want anything easily frayed or roughed up!


This is great for simple necklaces and bracelets! I really like that you can wear the necklace long or short depending on your outfit. I hope you enjoyed this post and that you use it too! :)

Keep on crafting!

Alison

Sunday, January 13, 2013

DIY Corner Bookmark

Hi everyone! I know it's been awhile and I promise to try my best to blog more! I've bee doing a lot more reading on my commute to work and decided to make myself a simple, yet functional bookmark! This corner bookmark is super easy to make and you can really personalize it and make it your own. Keep on reading to see how to make one! :)


Materials:
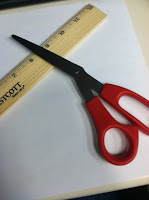
- Ruler
- Scissors
- Paper
-Tape/glue
- Markers, pens, pencils etc.


I used a plain sheet of paper but you can use cardstock or construction paper of any color to personalize your bookmark! Make it really fun!


Steps:

1. Using my ruler, I cut the sheet of paper down into a 5x5 square. Then I trimmed the edges so that they were even on both sides, like in the picture below.


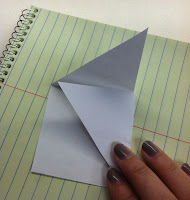
2. Now (this gets a little weird to descibe), cut what would be a small square out of one side of your paper. You should have an "arrow" shape now!


3. Fold the two ends of your "arrow" down so that you have a small square! After the second flap, take some tape or glue to secure it in place. Double sided tape works well or roll up your tape so that you won't be able to see it.


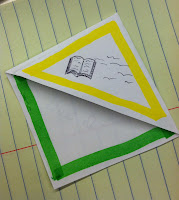
4. Decorate and personalize your bookmark! I wanted to keep mine fairly simple but decided to write a quote about reading on the back. Cheesy, I know... :)


Here's my Corner Bookmark!


What I've learned:

- Mark your measurements down in pencil lightly. They help a lot and you can go back to erase them.
- Whie plain paper works pretty well, I think using cardstock would be better especially if you want your bookmark to last you a long time.


I've recently started reading a lot more books which is actually part of my New Year's Resolution so this DIY Corner Bookmark project was great! I hope you liked this simple craft and that you try it out for yourself. What books are you guys reading and do you have any recommendations?


Alison :)