Saturday, November 10, 2012

Duct Tape Flower

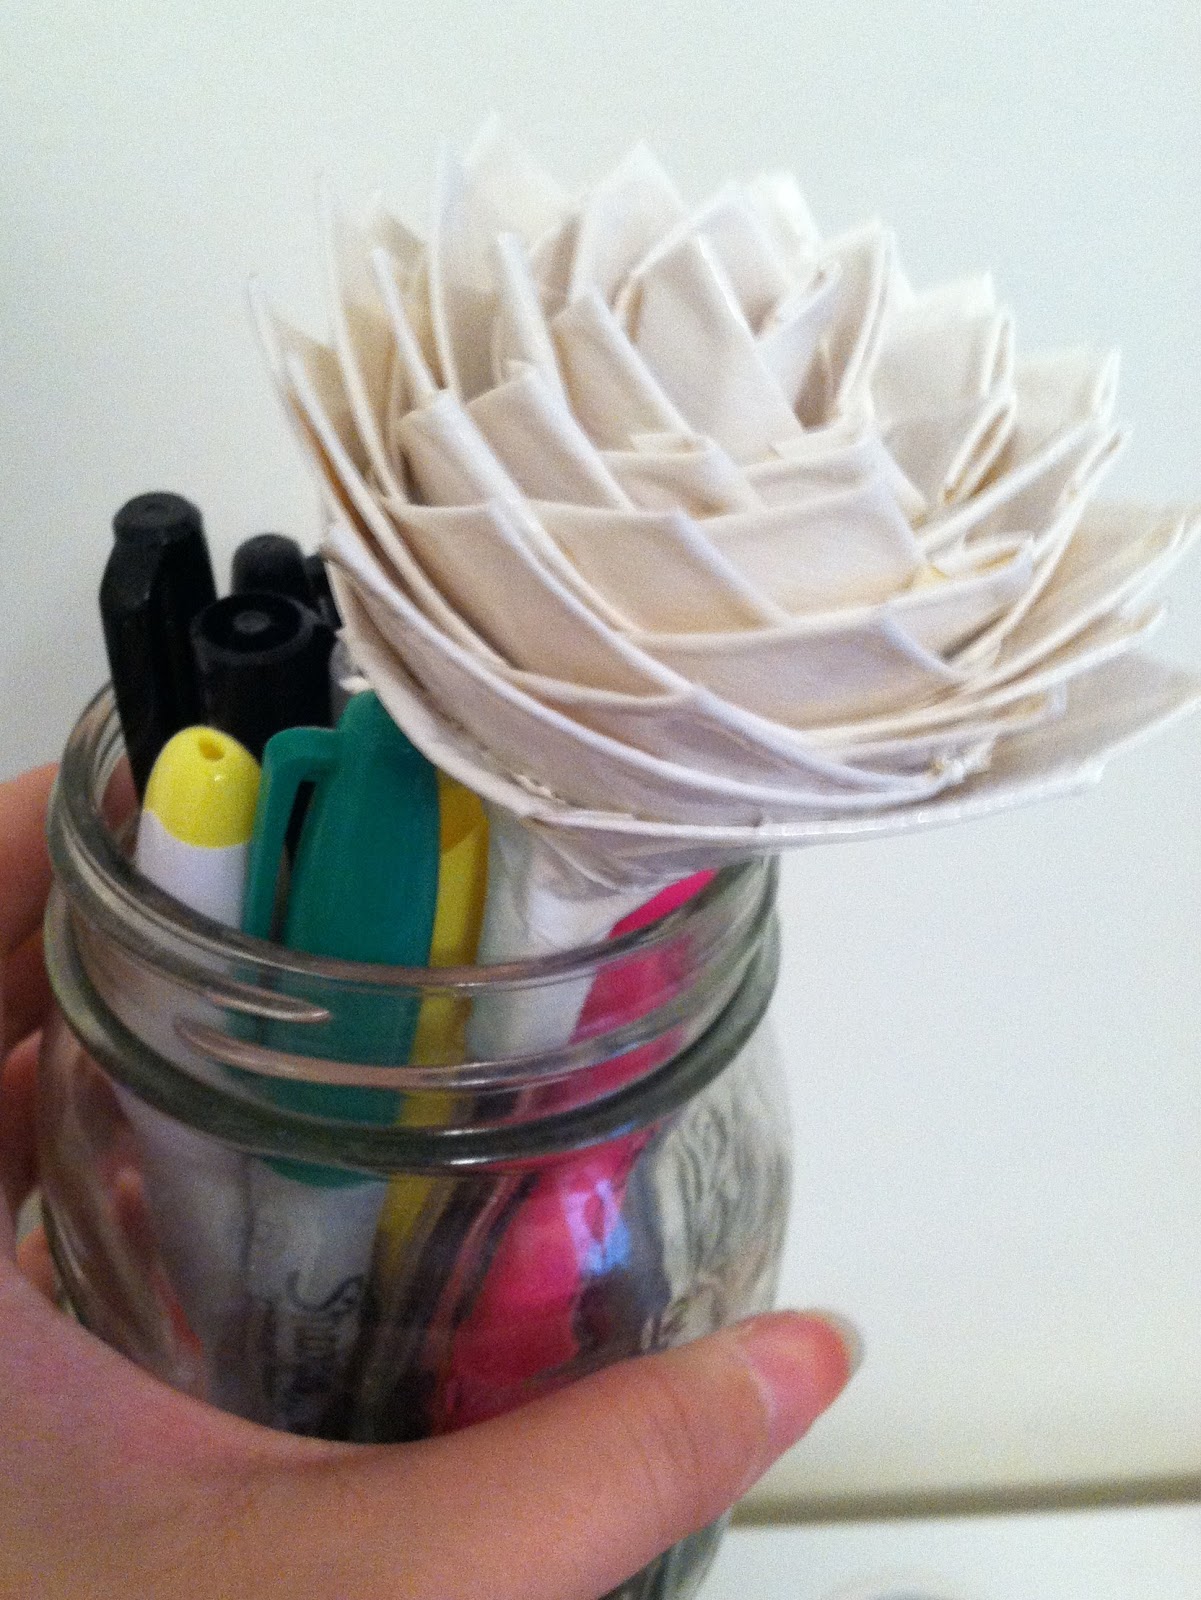
Hi everyone! I was trying to think up small ways to dress up my office cubicle and while I'm still coming up with more ideas (I have a new space to decorate! ^.^), I wanted to share this Duct Tape Flower I made that's now sitting in my pencil holder at work. A lot of my co-workers liked it so I hope you do too!

Materials:
- Duct Tape (I chose a white duct tape but there are so many colors/patterns you can find!)
- Pen or pencil
- Scissors (optional)


Steps:

1. Take your duct tape a rip/cut a small piece about an inch and a half long.


2. Fold down 2 corners of your tape so they make a triangle, while leaving some of the "sticky-side" of the tape exposed. Take you're pen and place stick it to one side of this strip of "stickiness". (I hope I'm making some kind of sense!)


3. With your pen on one side, roll the piece of tape so that it wraps all the way around your pen. This is your first petal! When you do this step, try to wrap it as tight and close to the pen as possible.


4. Great job! Now keep making petals and wrapping them around your pen. I tried to make sure the petals were not directly behind another petal, but to stagger them so there a petal between every two.


5. Once you get the hang of it, just keep on going! I tried to cover rough edges with new petals! You can make as many as you want and have them in different sizes if you want!


Here's how my Duct Tape Flower turned out!


What I've learned:

- The tops of your petals should be around the same height. To make it more "natural" I made some petals a little smaller or not as high up, and vise versa! 
- It's amazing how something like duct tape can be so pretty!
- Doing a good job on the first few petals can set you up for a great looking flower. ;)


I had a lot of fun making this flower (was watching some of my favorite tv shows at the same time!) and I hope you do too! I'm considering making a whole bouquet of Duct Tape flowers but we'll see how that goes! If you try it, let me know! 


Alison :)


Thursday, November 8, 2012

Paper Crane Decor


Hey guys! Today I'm going to share with you a new decoration I added to my room! It's colorful and fun and it adds a little something to a blank wall when you're renting an apartment like me (aka no holes in walls). Hope you like this idea!

Materials:
- Pre-made Paper cranes (I will be doing another post on how to fold paper cranes so don't worry if you don't know how to yet!)
- Needle
- Thread
- Tape
Steps:

1.  Start off by choosing the right color thread! I decided to go with a light color that would kind of blend into the walls. But if you want it to really pop, choose a bright color! Thread your needle and tie a knot on the end. Make sure your thread is pretty long, especially if you have high ceilings!


2. Once you have your first knot, add a paper crane by threading your needle through the middle of the crane. Leave an inch or so (depending on how you want to space out your cranes - I did 2 inches... otherwise they'd just fall on top of each other) and tie another knot before threading yet another crane.  


3. Keep repeating this concept over and over again until you have a nice string of paper cranes. See how the knots separate them a little?


Tape your string of cranes to the ceiling and... you're done!


What I've learned:

- Count the number of cranes you have a divide them up evenly into groups before you start. Having a plan helps!
- Try your best to space them as evenly as possible. It's not a big deal if you're off though!
- In one of the pictures above I taped my string of cranes to a desk, the longer it gets the easier it is to get them tangled up. Anchoring them will help!


I ended up making 5 strings of paper cranes with 17 cranes on each! Some of them ended up longer than the others (since I didn't do a great job of spacing) but I kind of found a way to make them work. This was fun way to liven up this wall and I hope some of you try it out!

You can do it too!

Alison :)


Monday, November 5, 2012

Dinner Paper Napkin Folding

Hi everybody! My friend showed me this cool paper napkin folding technique that restaurants use. I thought it was pretty cool so I figured I would share it with you. This is a cute was to dress up paper napkins when you have friends over for dinner. Hope you like it!

Materials:
- Paper Napkin (one of the fancier kinds, I guess?)

Steps:

1. Let's get started! Take your napkin and open in up like a book. Fold one layer from the bottom corner up to make a diagonal line.


2. Based on my picture above, turn the napkin clockwise once and flip it over. The bottom right corner on should be the start of the diagonal line when you turn the corner over. If so, fold the entire "back" of the napkin into three equal parts.


3. With the diagonal part now folded on the right bottom corner again, tuck the flap on the opposite side into the diagonal.


Flip it over and tuck your utensils in! My friend happened to work a Sushi place and they use chopsticks!


What I've learned:

- Napkin folding is so easy!
- Sharp creases will make it easier to fold.


How cute and easy is this napkin folding trick? I hope you guys liked this and try it out at your next dinner party. I don't have cloth napkins so this is simple alternative!


Alison :)

Wednesday, October 31, 2012

Bobby Pin Organization

Hey every-bobby! I just recently learned about this cool bobby pin organization trick and I've been so excited to show you! If you're like me and lose your bobby pins all the time, here's a great way to keep them in one place.

Materials:
- Magnetic Adhesive strips
- Flat surface
- Bobby pins

I love this idea because it keeps your bobby pins right there! So useful when you go to grab one while doing your hair.


Steps:

1. Get your magnets and test it out! Even when I hold the magnet strip upside down the bobby pins still stay on. If, for some reason yours don't stick too well.... I would (in the next steps) use 2 strips side-by-side, to make sure the bobby pins stay in place.


2. Peel back the adhesive paper and firmly press it onto your "flat surface". I chose to stick it on the inside of my wardrobe (honestly it's a bookshelf with doors that I put clothes, shoes, and accessories into). I know other people have used this in their medicine cabinets and on the inside of drawers too. Put yours close to where you usually get ready in the morning!


Here's how it turned out!  ----------------------------->
(I used flash so you can see better... made the picture look kind of weird though!)


What I've learned:

- Make sure to buy magnets with adhesive!
- You can use this same trick multiple times as long as you have more magnet strips and bobby pins.


This is so easy and I'm so excited to have a spot just for bobby pins. Obviously, we all probably have a whole lot more bobby pins but at least we'll have a few out and ready for everyday hairstyles. You won't have to go digging around for them anymore! Maybe this post will be able to save a few bobby pins?

Thanks for bobbin' by! (too cheesy?)

Alison :)