Materials:
- Artists tape or Painters tape (just make sure it has a low adhesive level)
- Scissors
- Wall hooks
You can use different colored tape if you want, I just happened to like keeping everything in black. If you don't like the tree decal, you can use this method and materials to make whatever you like!
Steps:
1. Pick a blank wall that you know needs some pizzazz! Take two long strips of your Artists tape and outline the trunk of your tree. I started mine above the floor molding and stopped it at about the middle of the wall in terms of height.
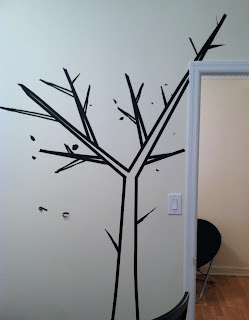
2. Now from the trunk, make a bunch of branches. The larger branches are the same as the trunk but for smaller branches I decided to rip strips of tape in half to make skinnier branches. (Ignore the random bits of tape on the walls please!)
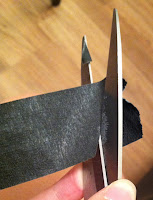
3. Once you finished making your branches, start making a ton of leaves. I found two ways to make leaves. Either cut two halves and put them together or tape two long strips together and cut a whole leaf from that. I used both techniques! Your leaves should all be a little different so don't worry about it if some are smaller than the others.
4. Great, once you've made a bunch of leaves, start placing them on your wall. I did 3-5 leaves at the end of each branch so just use your best judgement! (I decided to add an extra branch too! >.<)
5. I wanted to add a few wall hooks and camouflage them in the tree branches. Strategically place your wall hooks under the tape that would be your branches or leaves!
6. This is also an optional step. I just wanted to a add a little bit more detail to my tree so I added some bark, which is just skinny strips of tape!
Here's the finished wall decal!
- For a softer look, rip the tape instead of cutting it with scissors. A lot of my leaves have ripped edges!
- If you don't like how something is turning out, change it! This tape is super easy to remove, and I basically have a whole roll of tape left over so you'll have plenty of materials.
- The tape doesn't really stick too well to itself so when you're done, go back and trim some of the edges.
I seriously love love love this and I'm so glad I thought twice about buying an expensive wall decal! I hope you get to try this on one of your walls, you could do something completely different! I'm considering adding some woodland creatures, maybe a bird or a squirrel to run around my room...?
Come back for more craft ideas!
Alison


supperbbbbbb!!!!!!!!
ReplyDelete