Materials:
- Old tee shirt
- Shears
- Ruler or measuring tape
- Pin
I used a black shirt, in hindsight a lighter colored shirt would work better for this look, especially in summer!

Steps:
1. First, go ahead and cut off your sleeves and the collar part of your shirt. After you get the collar off, you can decide on what neck line you want. I went with a small v-neck but you could try boat neck, scoop neck (you could get crazy!) etc.
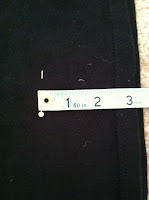
2. Here, you should measure out where you will cut your shirt. I pinned a few spots (on my shirt, not the website!) as references. I started cutting 6 inches from the bottom of my shirt on both sides, meeting in the middle on the front of my shirt just above the hem. Make sure you're only cutting the front of your shirt!
3. For the back of your shirt, I cut it in a bit of a "U" shape. The lowest point was 3 inches from the bottom of the shirt. This shape will keep you a little more covered up than if you just cropped it straight across. The sides of our "U" shape should be a 6 inches, meeting with the cut we made on the front.
4. Now on the front of our shirts we have to cut the two parts that will tied together to make our Front Tie Shirt. Just start in the middle and cut upward. This cut on my shirt is about 7-8 inches, which seems like a lot but it has to be long enough so that you can tie the two pieces together. I recommend trying it on and seeing how it feels. When you decided that the cut is long enough, try and cut out a small circle at the top of the cut. This will hopefully prevent the pieces ripping further apart.
5. Try on your new Front Tie Shirt and tie those ends together!
What I've learned:
- Cut your shirt as straight and clean as possible, try your best! (Mine's a little raggedy...)
- Try your shirt on between steps or whenever you want to double check anything. I adjusted my neckline about 5 times, trying it on after every adjustment to see if it looked better!
Here's what my new Front Tie Shirt looks like! I really like that it's a little longer in the back since I'm showing my midriff!
I think I would wear this shirt (or this type of shirt in a different color) to a picnic, barbecue, and going to the pool or beach as a cover up! My sister likes it a lot so I guess I'll be making more anyways!
I hope you guys like this DIY and that you get the chance to try it out yourself! Let me know how it goes!
Alison :)


It's going to be ending of mine day, but before end I am reading this wonderful paragraph to increase my experience.
ReplyDeleteTake a look at my blog: www.pikavippii.com