 Materials:
- Knitting needles
- Yarn
- Buttons
- Threader
I chose a multi-colored yarn and I had a friend ask how many different yarns I had to use! I guess the different colors not only hide mistakes a little better, but also make your scarf look more impressive! :)
Steps:
1. First make a slip knot onto one of your knitting needles. If you don't know what a slip knot is, I hope these pictures help! (I forgot to take pictures when I first tried this so took some with different yarn.)


2. Now to Cast on! Wrap the loose end around your thumb and the strand attached to the ball of yarn around your index finger. Grab the thread with the other three fingers and pull the needle down and over your hand to make your "sling shot". Take your needle and guide it under yarn section "1" (*see picture below*), over "3" over and then under "2" and back through the loop in between "1" and "3". Keep casting on your yarn based on how wide you want your scarf to be!


3. Now I'm going to show you a basic stitch that I learned called the knit stitch. Take your other knitting needle (on the right side of each picture) and tuck it under the first loop so that your needles are crossed. Next take the yarn attached to your ball of yarn and loop it over the needle in your right hand, and pull! Take your needle and pull up and under and pull the cast on loop off! Congratulations, you made your first stitch! Keep doing this pattern over and over again until you finish one row. Then switch the needles and keep going until you finish you're scarf! (this will seem weird but keep on going!) I hope these pictures help if my description wasn't too great.


4. When I finished knitting my rectangular mat-thing (aka scarf!!) I cut the yarn free from the ball of yarn and threaded it through the loops from where the needle was. I then tied the end so it wouldn't come undone. My scarf ended up being too wide so I folded one side over and used some extra yarn to make little knots that would keep the "mat" folded over. For this, I used a threader to help me loop the yarn from one side to the other. It was super helpful!


5. I decided that I didn't want the buttons to show, so I chose to sew 2 clear buttons on the inside of my scarf. The buttons can be looped through any of the stitches in the scarf! I used the threader again to get the yarn through the button holes, otherwise it's practically impossible!


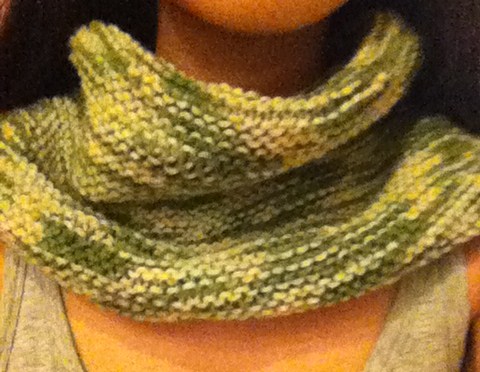
Here's what it looks like when you're done!

I'm probably going to wear mine in three ways! What do you think?


What I've learned:
- Fix any missed loops for skipped stitches as soon as you see them! They can jeopardize you're entire scarf! it would be awful to have the whole thing unravel from the middle!
- Be creative. I didn't know what I was making when I started knitting but I found a way to love my "scarf"!
- Learning to knit takes patience, but hey! If I can do it, you can too! ;)
Learning to knit was a lot harder than I thought it would be (props to grandmas around the world!). Also describing how to knit in this blog post wasn't a walk in the park either, so if you don't really get it email me or comment so I can help! I really hope this post reaches at least one person, and inspires you to knit! This was my first time knitting so if you had trouble, believe me I was so lost at first! I am so glad I was able to make this "thing" and turn it into a scarf that I now find unique, versatile and useful!
Anyways, for those of you who make this scarf or learn to knit... GREAT JOB! I hope you like your new scarf, it'll be perfect for winter weather!
Love to hear from you,
Alison ^.^
No comments:
Post a Comment